Inclusive Design Mapping
This activity is intended to be used in the context of co-design, where a diverse set of co-designers, including people who presently have difficulty using the design, are active participants in the design process.
The exercise is about stretching and reaching: to include people who are currently at the edges and who are therefore usually excluded from the design process. It is also about balance and flexibility: creating a design that does not compromise the experience of one person to make room for the requirements of another.
In this activity, co-designers choose appropriate facets (or “slices”) from the accompanying set of Inclusive Design Mapping Facets (downloadable pdf), to piece together a map of user needs as well as the functional requirements of a product or service. Once mapped, gaps between needs and requirements can then be identified.
This activity utilises the accompanying Inclusive Design Mapping facets card deck. Co-designers are able to create their own facets if they can't find a desired state or context within the provided set.
Why
Step 1
Choose the facets that are relevant to the needs, preferences and the context you are designing for or critiquing.
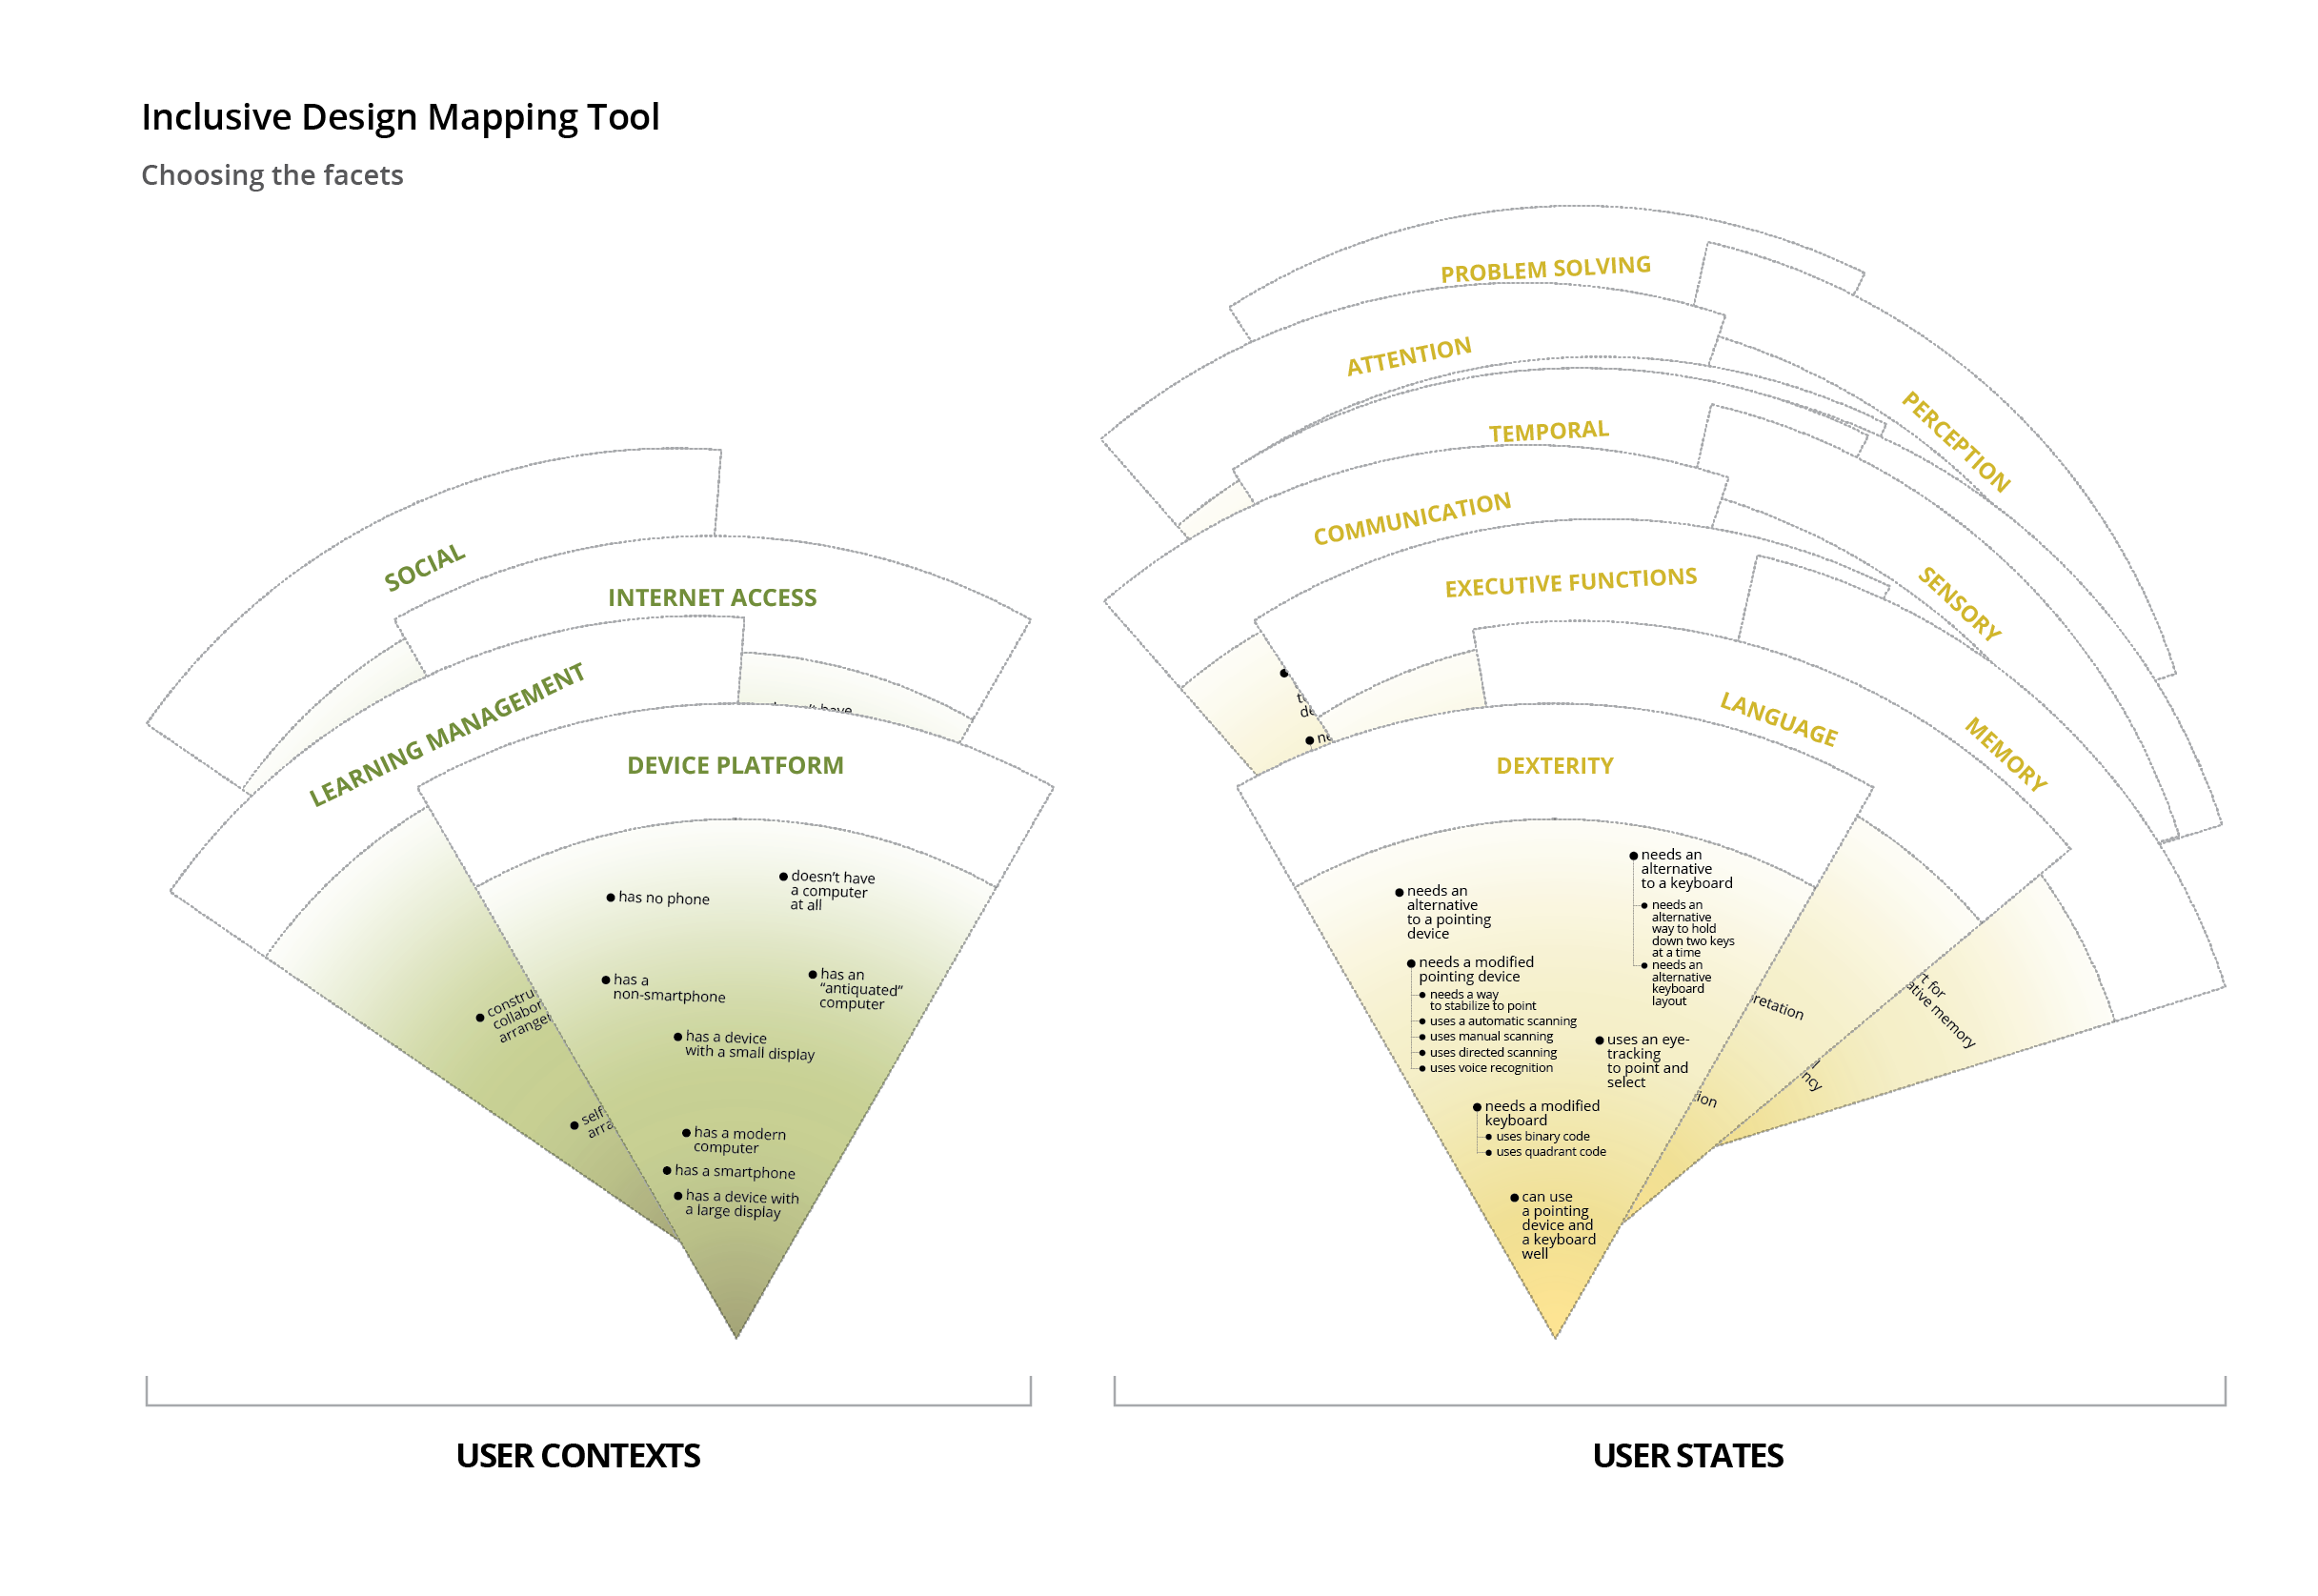
Figure 1: Inclusive Design Mapping Tool - Choosing the Facets
Step 2
Map your needs, preferences and context on the selected facets. Next, using a different color, map the product/task/solution you are trying to critique or design.
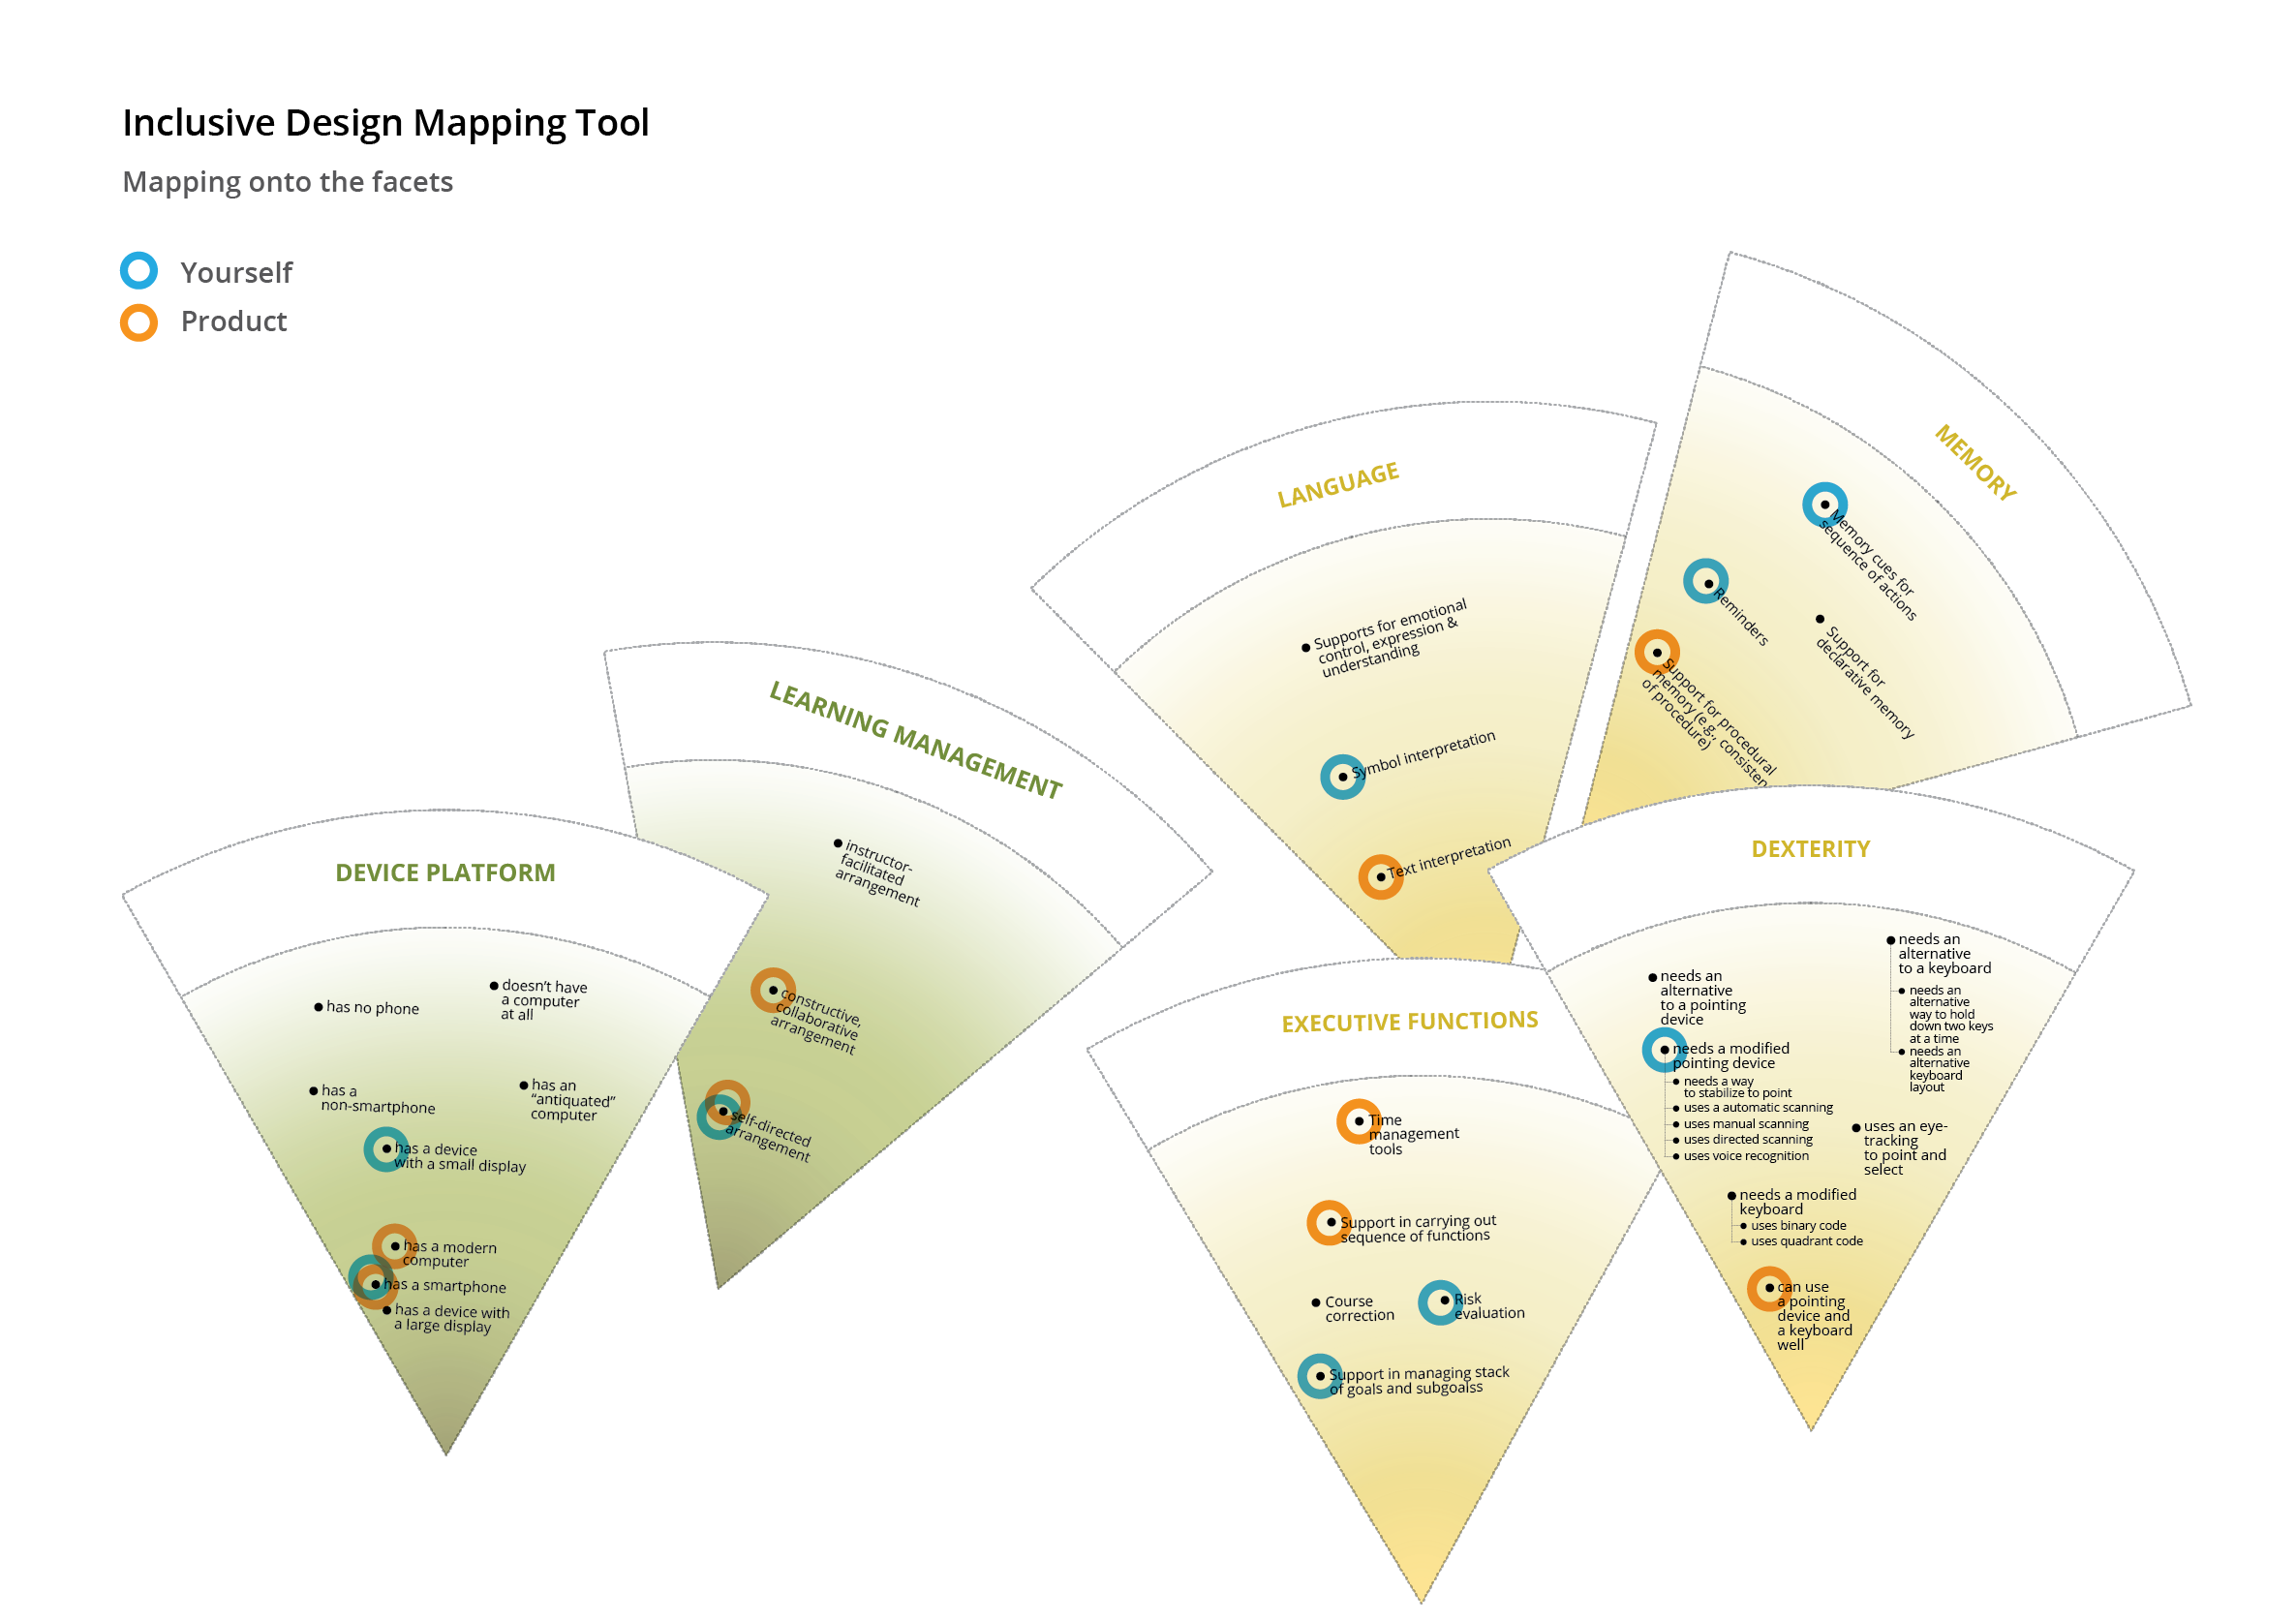
Figure 2: Inclusive Design Mapping Tool - Mapping onto the Facets
Step 3
Now you can put the facets together, draw a jagged outline, and shade in the gap between the two outlines.
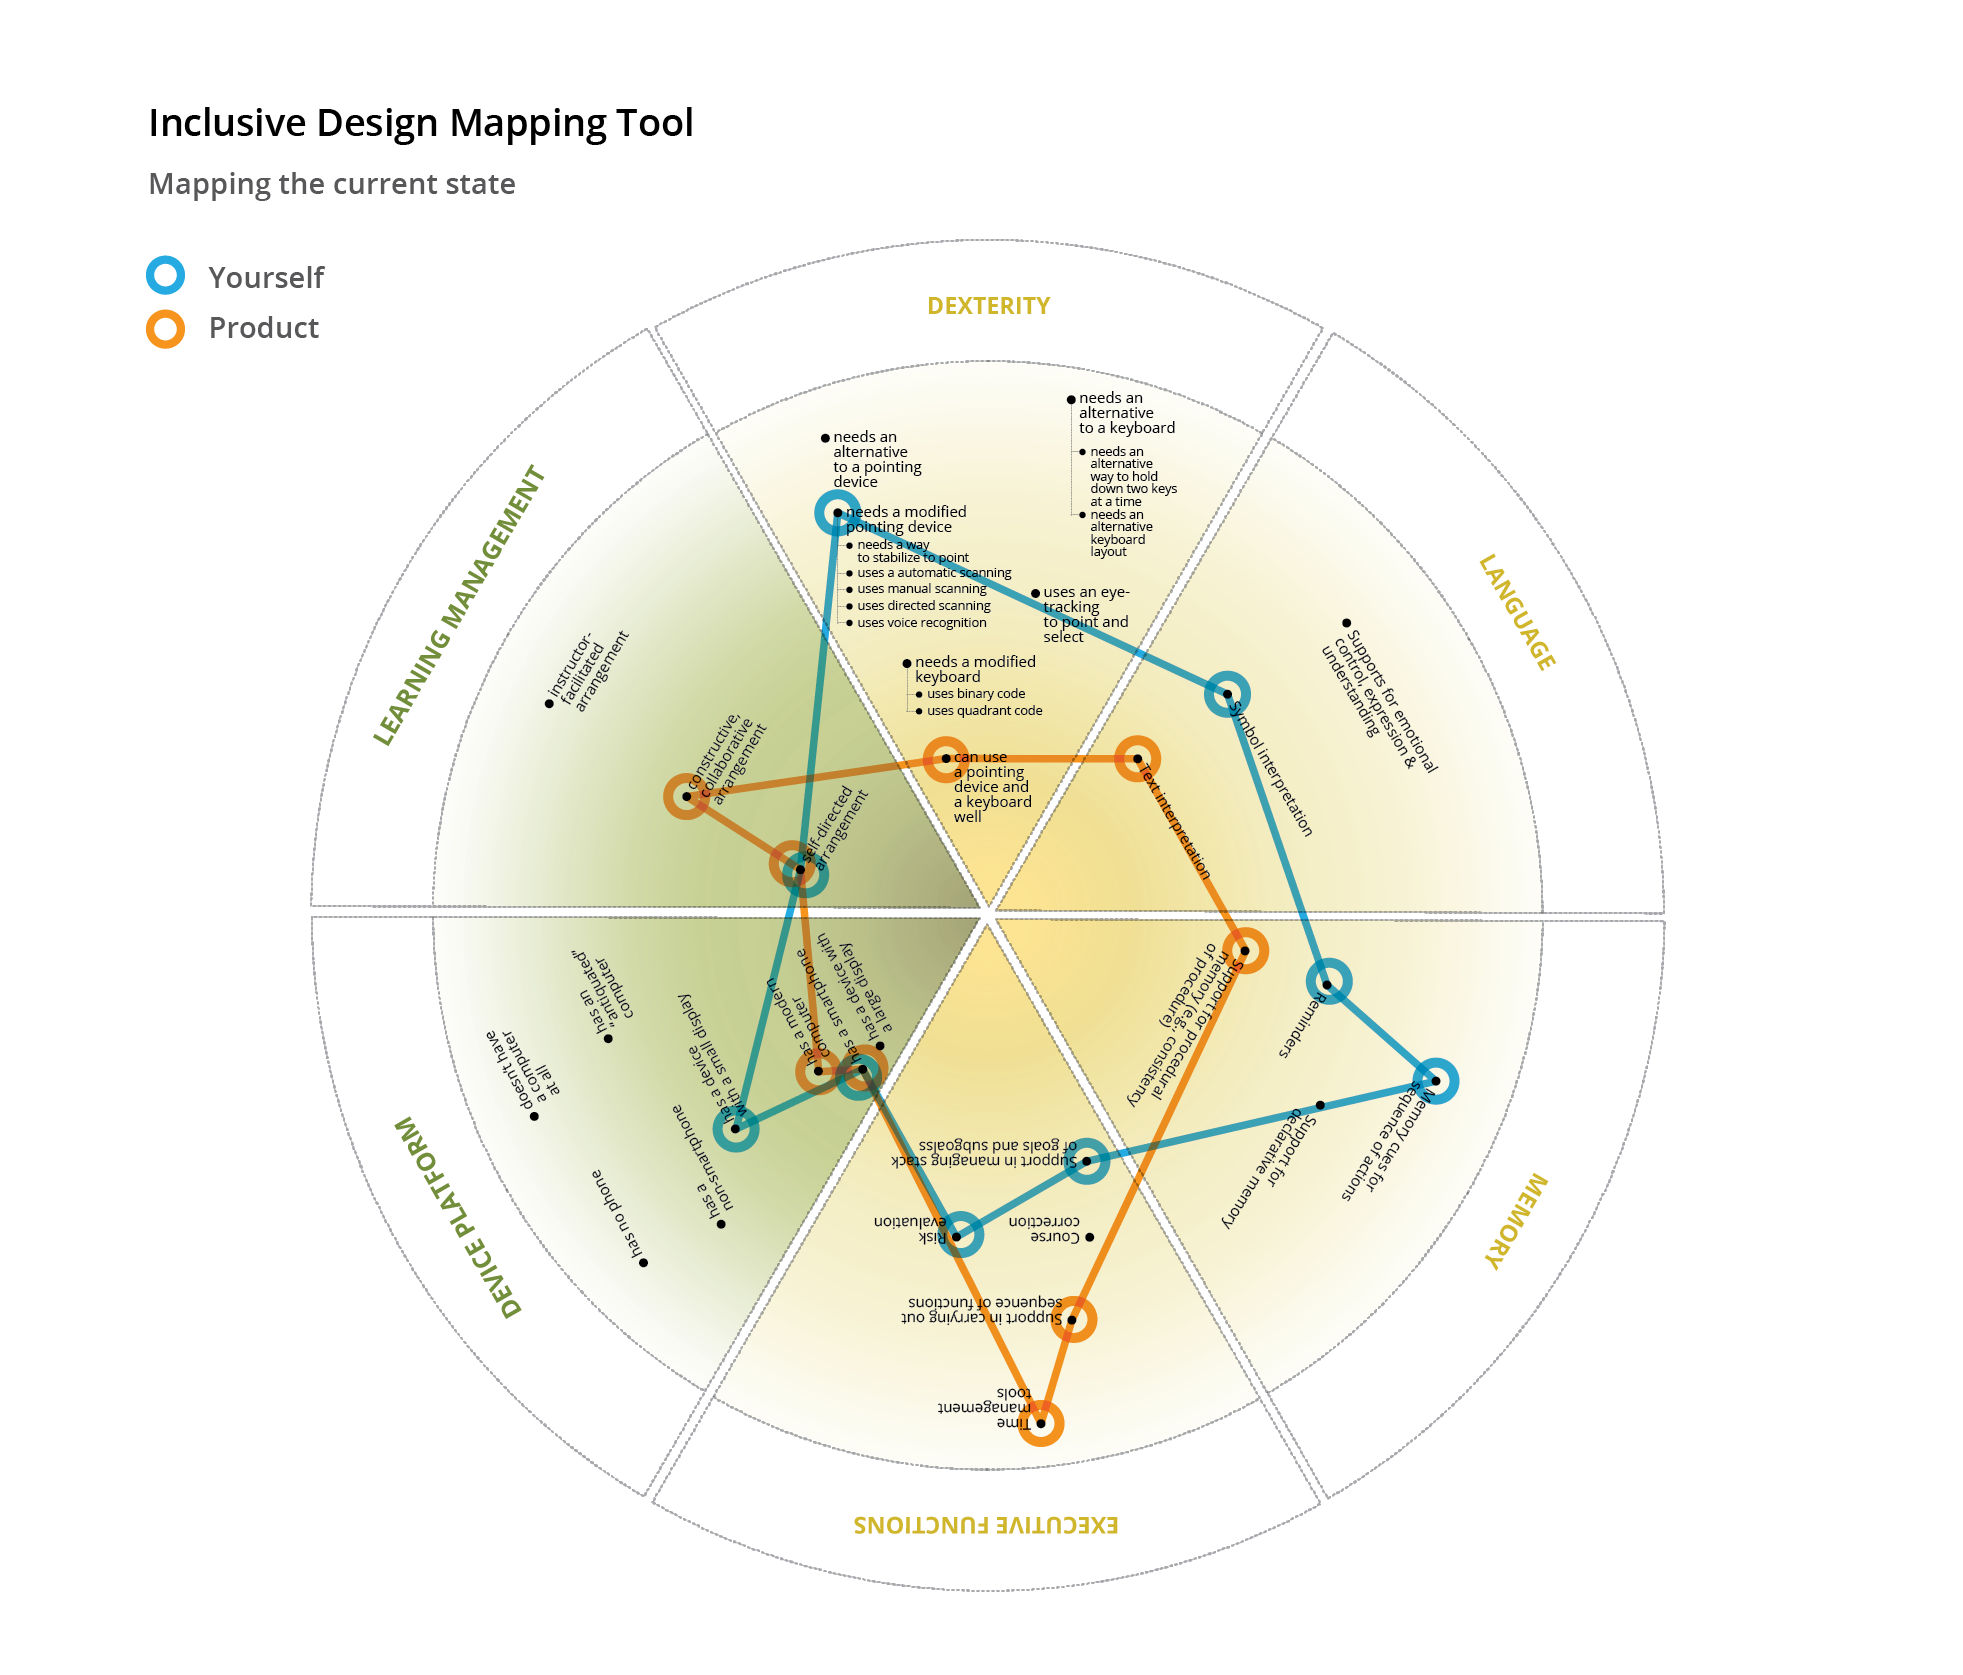
Figure 3: Inclusive Design Mapping Tool - Mapping the Current State
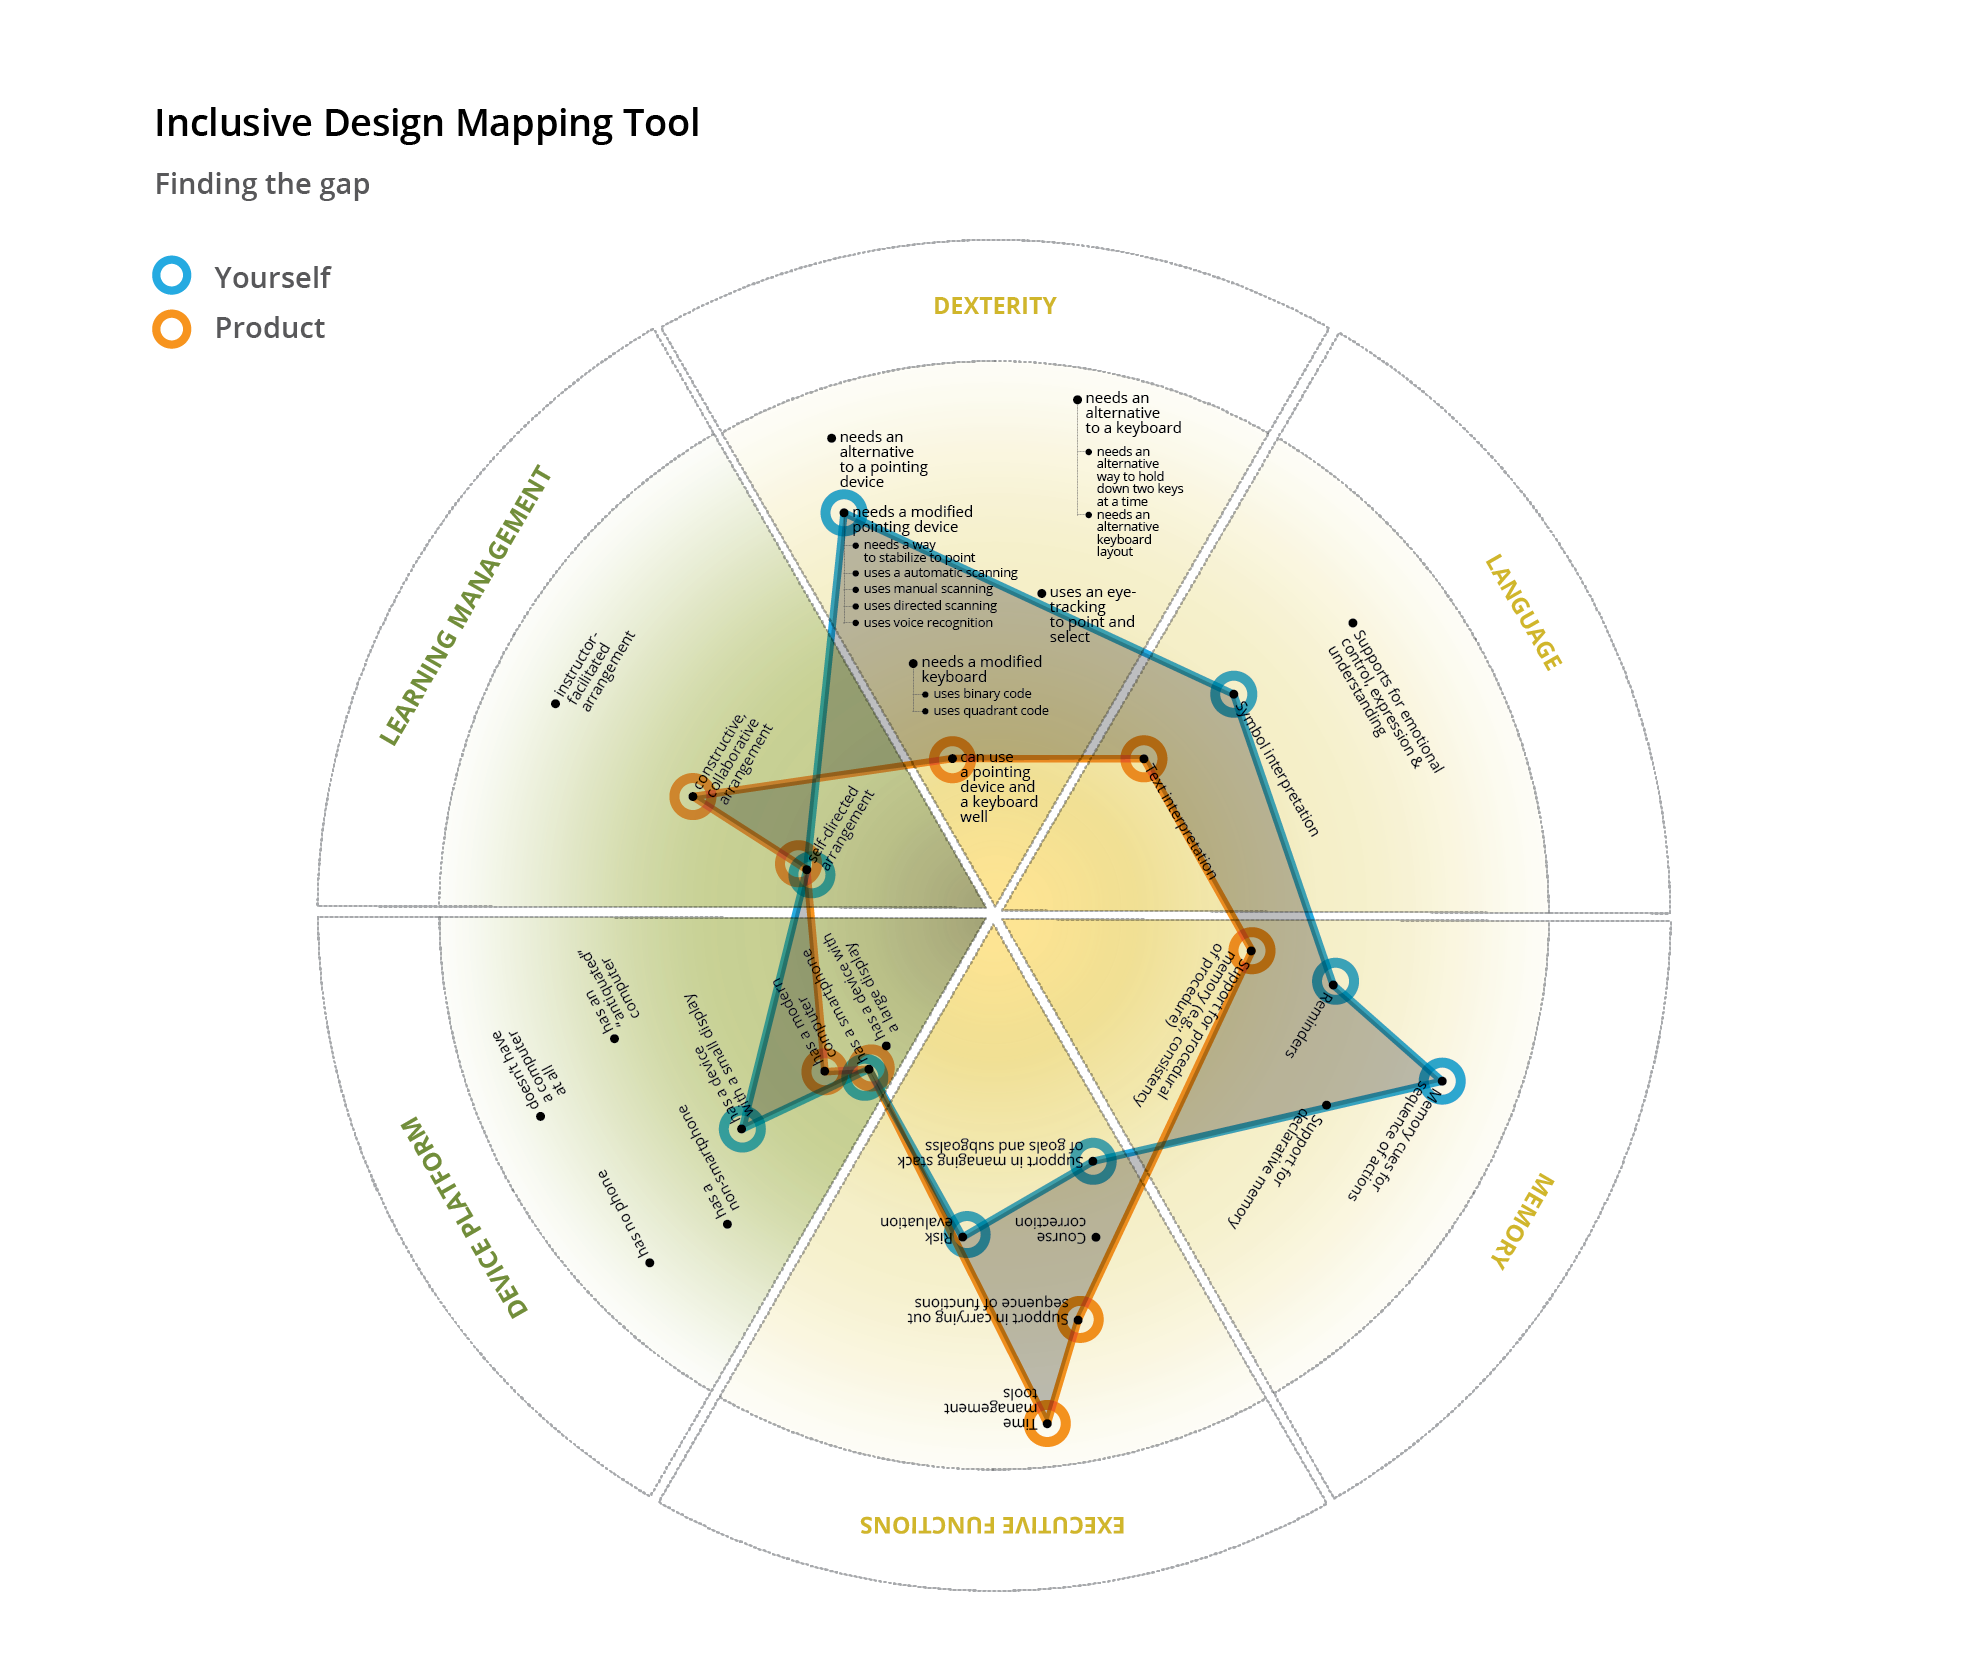
Figure 4: Inclusive Design Mapping Tool - Finding the Gap
Step 4
Once you have a proposed new design, redo the map, with the goal of fully encompassing the jagged outline of the edge users. While iterating through the design process, the mapping can be very useful for identifying where your design does not stretch enough to meet the needs of edge users.
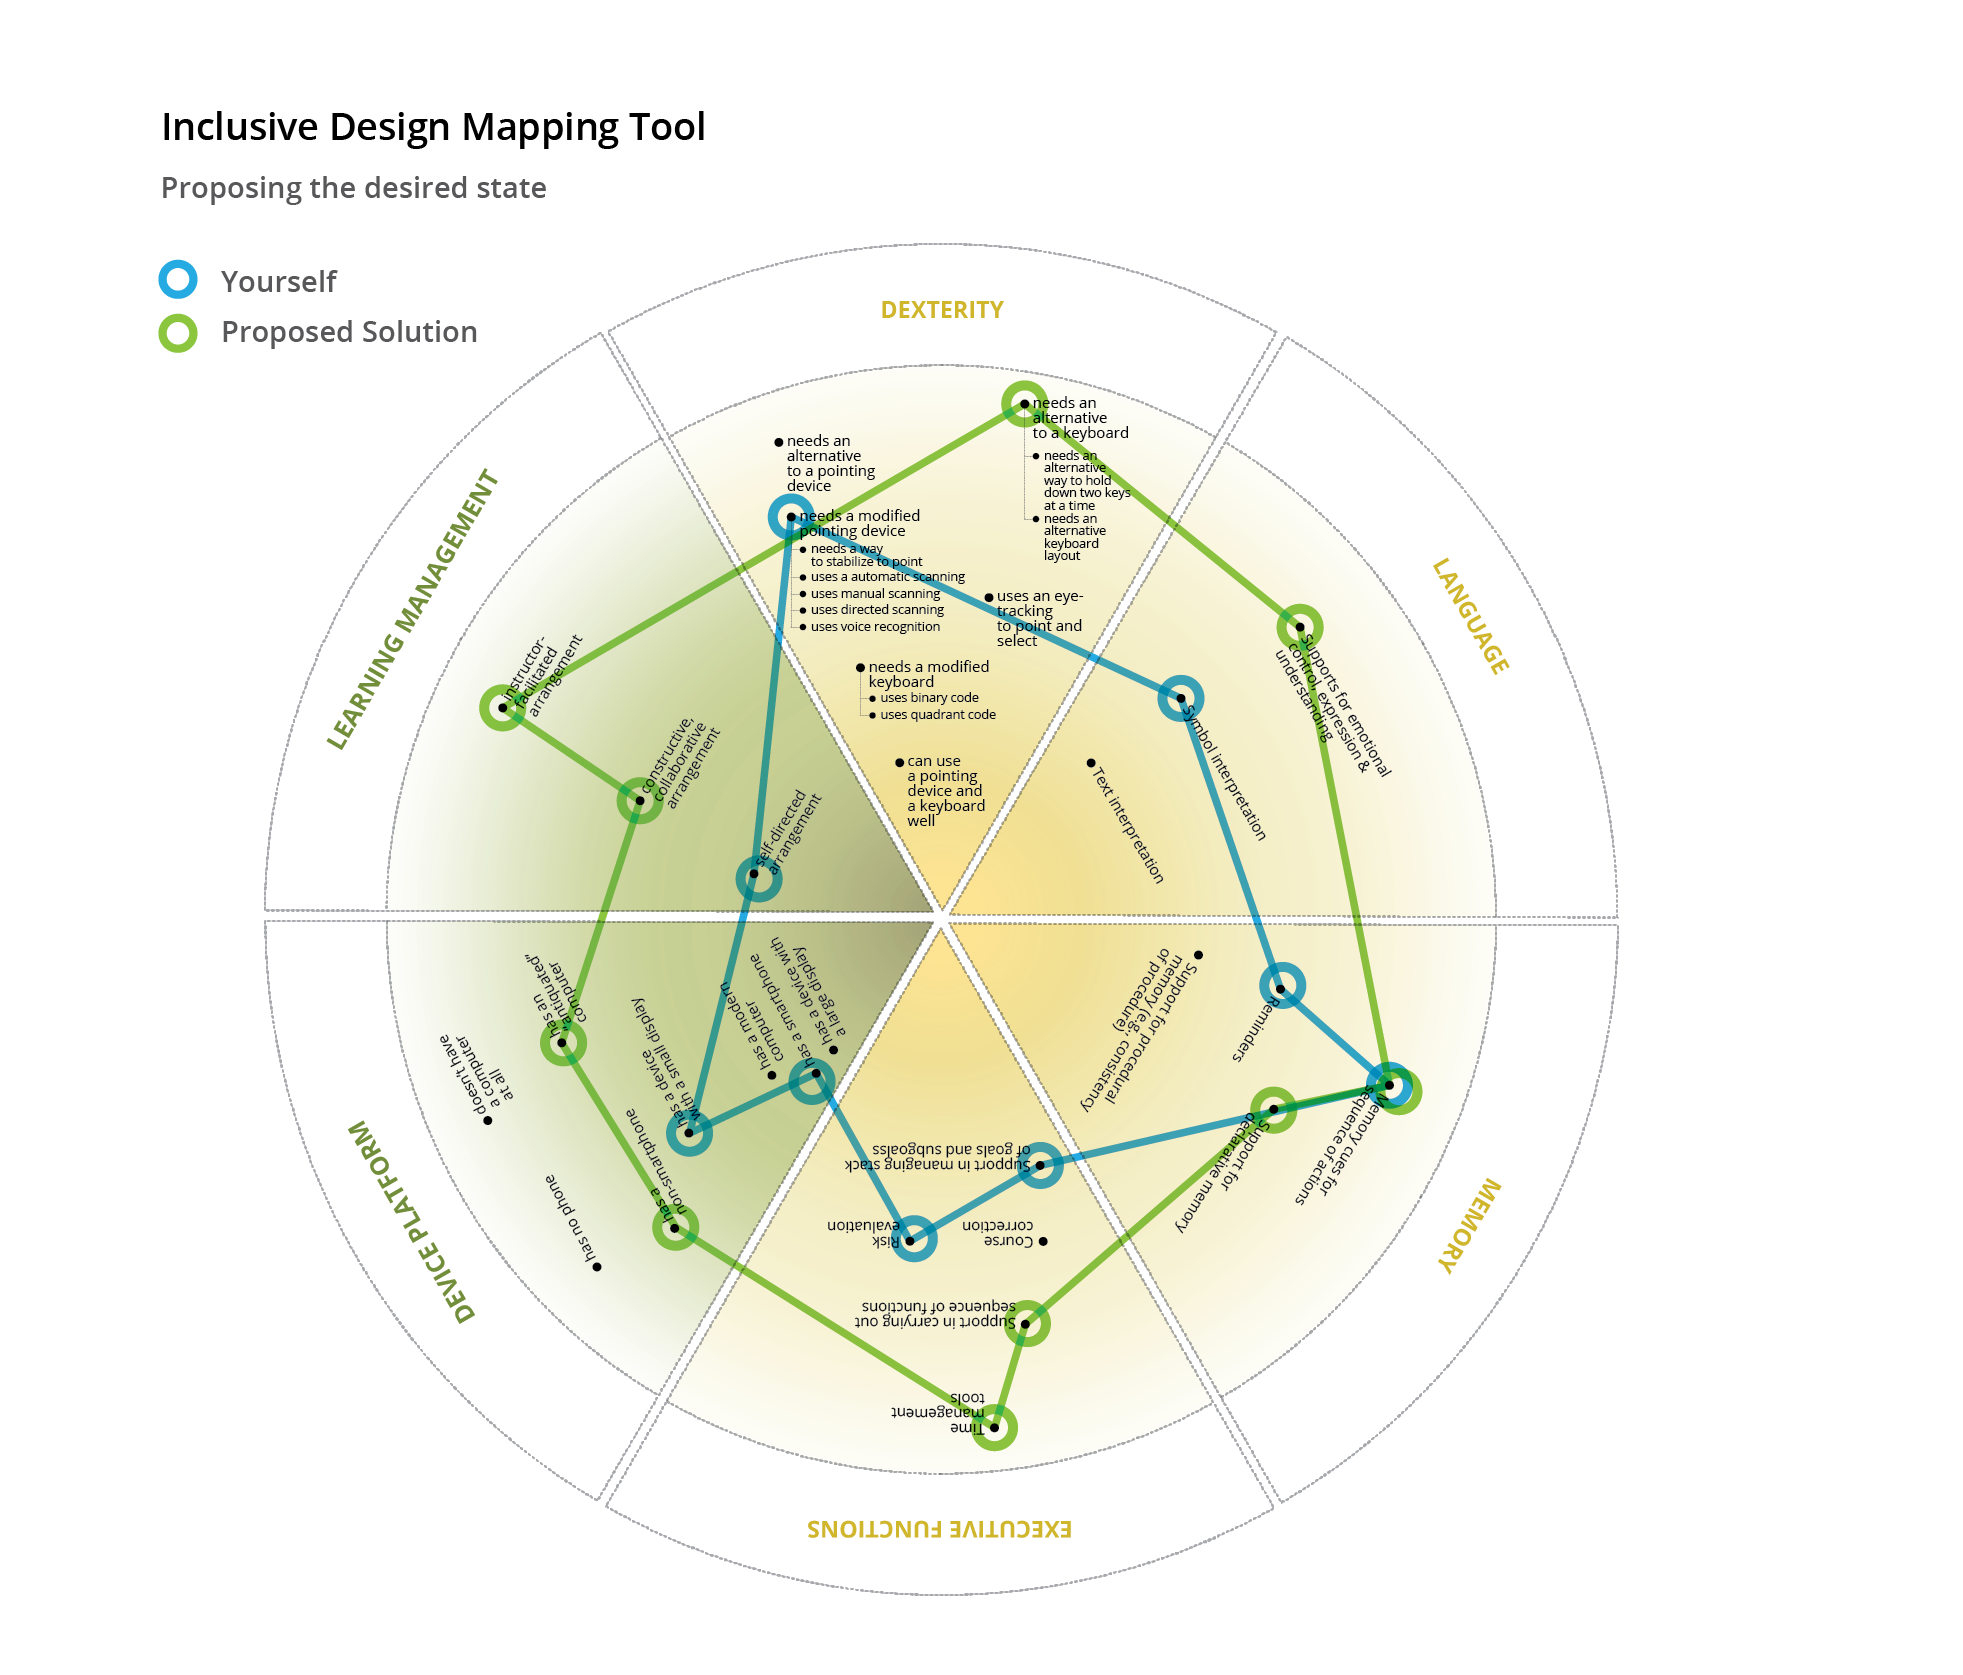
Figure 5: Inclusive Design Mapping Tool - Proposing the Desired State